
Managing employee expense reimbursements is a classic business use case — and a perfect fit for Oracle APEX Workflows. In this blog, we’ll build a real-world, end-to-end Expense Reimbursement Workflow where small expenses are auto-approved and larger ones require manager approval.
By the end of this guide, you’ll have:
- An automated approval flow
- Conditional logic (auto vs manual approval)
- Human tasks for managers
- Email notifications
- A working submission form
Let’s dive in 🚀
🧩 Workflow Scenario
Business Rules:
- An employee submits an expense claim
- If the amount is less than $100 → ✅ Auto-approved
- If the amount is $100 or more → 👨💼 Manager approval required
- If approved → 💸 Payment is processed
- If rejected → 📧 Employee is notified
🔧 Part 1: Prerequisites – Database Setup
Before creating the workflow, we need a table to store expense claims.
Run the following SQL in SQL Workshop:
CREATE TABLE expense_claims (
    claim_id        NUMBER GENERATED BY DEFAULT ON NULL AS IDENTITY PRIMARY KEY,
    employee_name   VARCHAR2(100),
    employee_email  VARCHAR2(100),
    expense_type    VARCHAR2(50), -- Travel, Meals, Hardware
    amount          NUMBER,
    description     VARCHAR2(4000),
    status          VARCHAR2(20),  -- SUBMITTED, APPROVED, REJECTED, PAID
    submitted_date  TIMESTAMP WITH LOCAL TIME ZONE DEFAULT SYSTIMESTAMP
);
This table will be the backbone of our workflow.
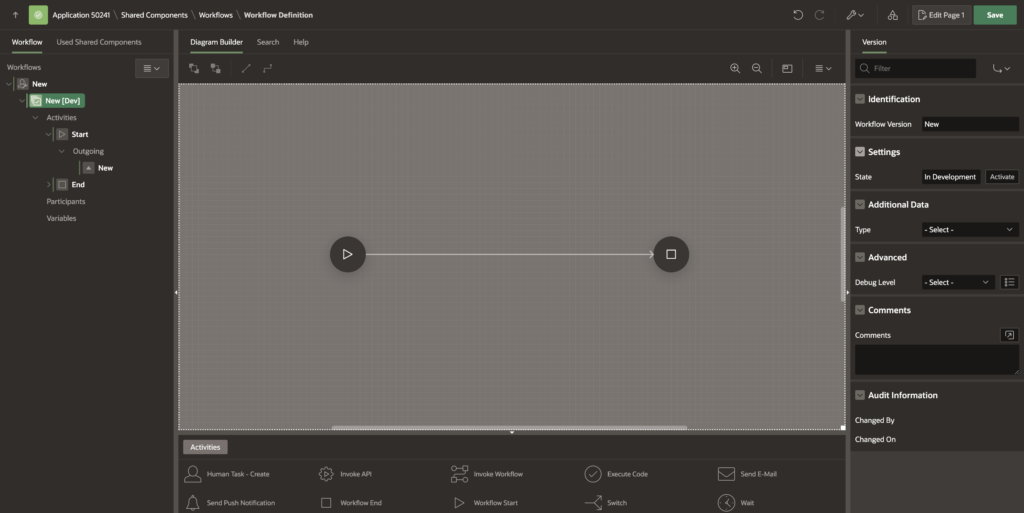
🔁 Part 2: Creating the Workflow
Navigation:
Shared Components → Workflows and Automations → Workflows → Create
Workflow Details:
- Name: Expense Reimbursement
- Static ID: EXP_REIMB
- Version: 1.0
- Title: Expense Claim for &EMPLOYEE_NAME.
Delete the default Execute Code activity so you start with a clean slate.
📦 Part 3: Defining Data (Parameters & Variables)
1️⃣ Workflow Parameters (Inputs)
Create the following parameters:

| Label | Static ID | Data Type | Purpose |
|---|---|---|---|
| Employee Name | EMPLOYEE_NAME | VARCHAR2 | Display & routing |
| Employee Email | EMPLOYEE_EMAIL | VARCHAR2 | Notifications |
| Amount | AMOUNT | NUMBER | Approval logic |
| Claim ID | CLAIM_ID | NUMBER | DB row reference |
2️⃣ Workflow Variables (Internal Logic)
Create these variables:

| Name | Static ID | Data Type | Purpose |
|---|---|---|---|
| Task Outcome | TASK_OUTCOME | VARCHAR2 | APPROVED / REJECTED |
| Approver | APPROVER | VARCHAR2 | Who approved |
🔀 Part 4: Auto-Approval Logic (Switch Activity)
We’ll automatically approve low-value expenses.
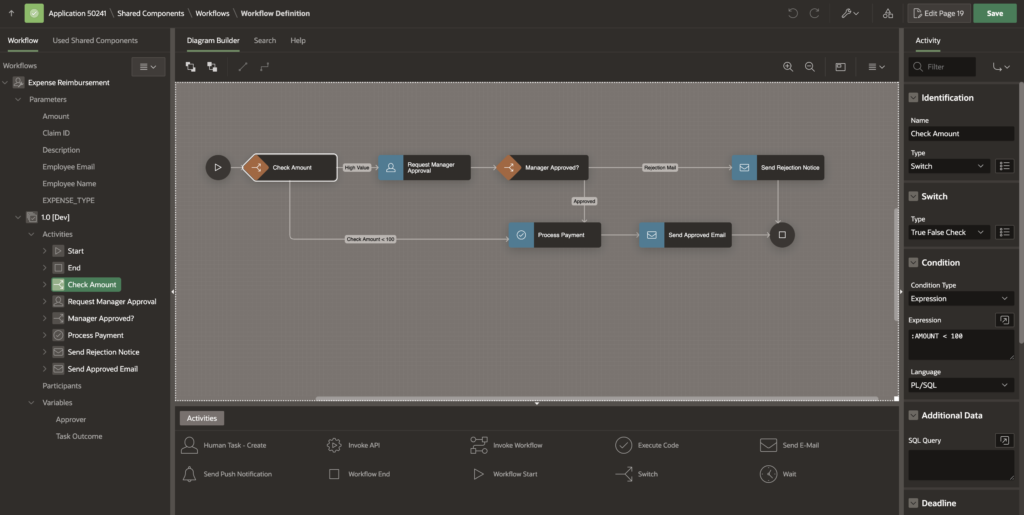
Steps:
- Drag a Switch activity after Start
- Name it: Check Amount
- Type: PL/SQL Expression
- Expression:
:AMOUNT < 100Branches:
- True → Auto-Approve (skip manager)
- False → Manager approval required
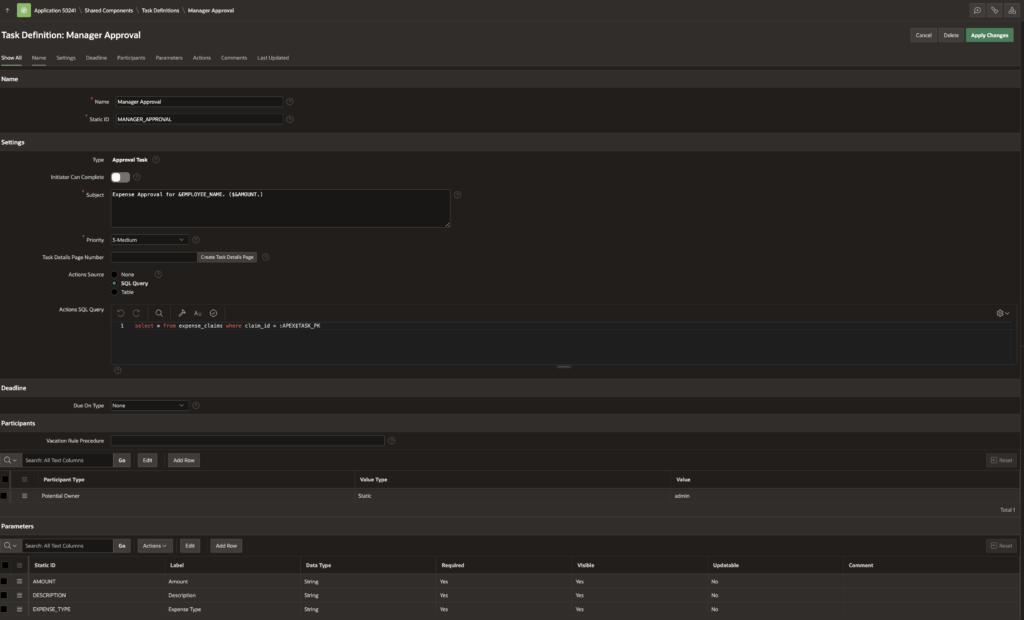
👨💼 Part 5: Creating the Human Task (Manager Approval)
Before adding a Human Task to the workflow, define it.
Task Definition
Navigation:
Shared Components → Task Definitions → Create
Settings:
- Name: Manager Approval
- Subject: Expense Approval for &EMPLOYEE_NAME. ($&AMOUNT.)
- Priority: Medium
Participants:
- Type: Potential Owner
- Value: admin (or role/user)
Actions Source (SQL):
select * from expense_claims where claim_id = :APEX$TASK_PK;Task Parameters:
- AMOUNT
- DESCRIPTION
- EXPENSE_TYPE
Save the task definition.
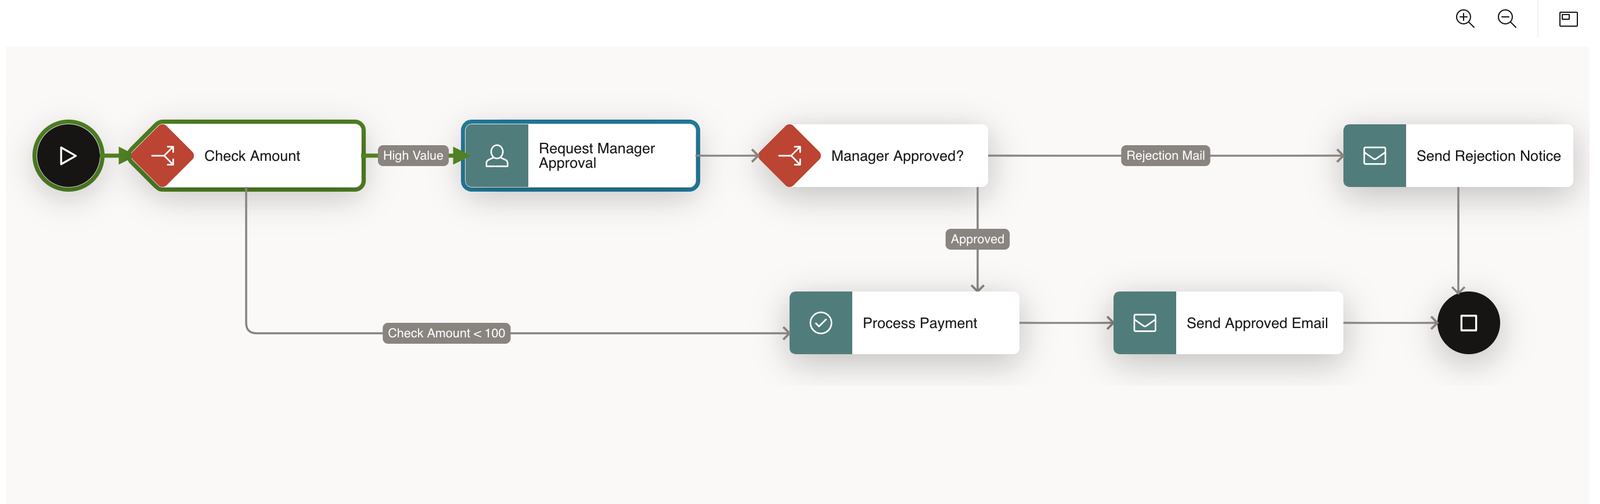
🧱 Part 6: Completing the Workflow Diagram
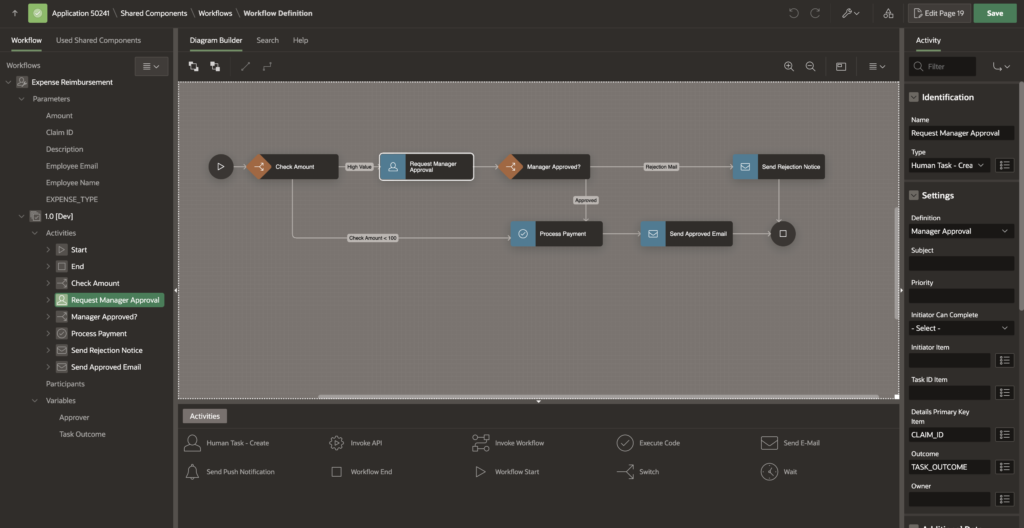
🔹 Step A: Manager Approval Path
Drag Human Task – Create:
- Name: Request Manager Approval
- Task Definition: Manager Approval
- Details PK Item: CLAIM_ID
- Task Outcome Item: TASK_OUTCOME
Connect:
- From Check Amount → False → Human Task
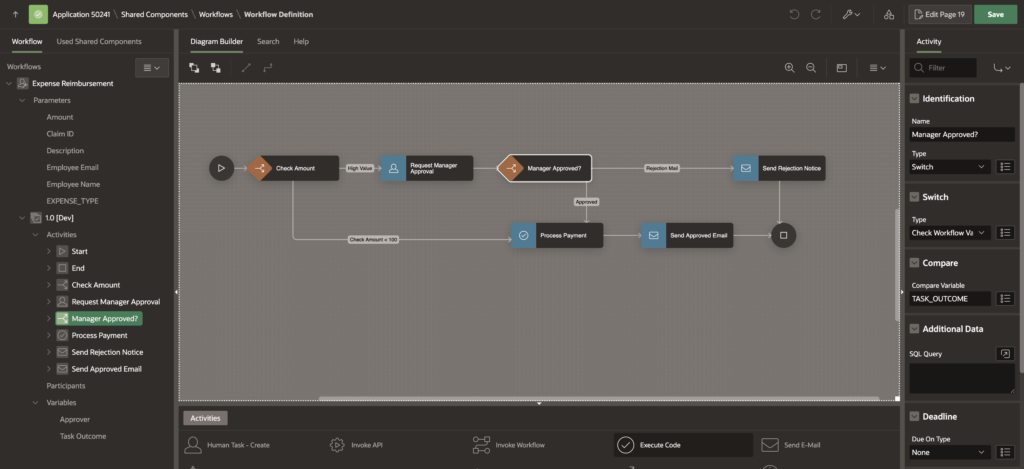
🔹 Step B: Manager Decision Check
Add a Switch after the Human Task:
- Name: Manager Approved?
- Type: Check Workflow Variable
- Variable: TASK_OUTCOME
- Value: APPROVED
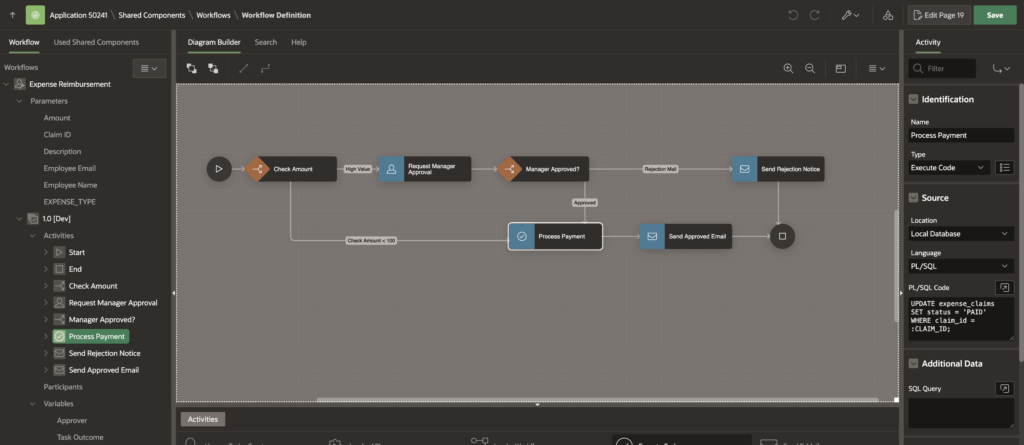
🔹 Step C: Process Payment
Both auto-approved and manager-approved paths lead here.
Add Execute Code activity:
- Name: Process Payment
UPDATE expense_claims
SET status = 'PAID'
WHERE claim_id = :CLAIM_ID;
Connections:
- Check Amount (True) → Process Payment
- Manager Approved? (True) → Process Payment
🔹 Step D: Rejection Path
Add Send E-Mail activity:
- Name: Send Rejection Notice
- To: &EMPLOYEE_EMAIL.
- Body:
Your expense claim for $&AMOUNT. was rejected.(Optional) Add Execute Code to update status:
UPDATE expense_claims
SET status = 'REJECTED'
WHERE claim_id = :CLAIM_ID;
Connect:
- Manager Approved? (False) → Send Rejection Notice

🔹 Step E: End the Workflow
Connect both:
- Process Payment → End
- Send Rejection Notice → End
📝 Part 7: Creating the Submission Page
Create a Form Page:
- Table: EXPENSE_CLAIMS
- Page Name: Submit Expense
- Items: Name, Email, Amount, Description, Expense Type
▶ Integrating the Workflow
Go to Processing tab:
Create a Process:
- Type: Workflow
- Action: Start
- Workflow Definition: Expense Reimbursement
Primary Key Item:
- P_CLAIM_ID
Parameter Mapping:
- EMPLOYEE_NAME → P_EMPLOYEE_NAME
- AMOUNT → P_AMOUNT
- CLAIM_ID → P_CLAIM_ID
⚠️ Important: Ensure this process runs after the Automatic Row Processing (DML) process.
🧪 Part 8: Testing the Workflow
✅ Test 1: Auto-Approval
- Submit expense: $40
- Result: Status immediately becomes PAID
👨💼 Test 2: Manager Approval
- Submit expense: $150
- Status remains SUBMITTED
- Approver receives task
- Approve task → Status becomes PAID
🎯 Final Thoughts
This example demonstrates how powerful and clean Oracle APEX Workflows are for real business processes:
- Conditional routing
- Human approvals
- Automation
- Notifications
You can extend this further with:
- Multi-level approvals
- SLA reminders
- Audit history
- Dynamic approvers
Happy building with Oracle APEX! 🚀
Hi, I’m Ankur Rai, an Oracle APEX Developer with 6+ years of professional experience in building enterprise applications. I specialize in creating scalable and efficient solutions using Oracle APEX, PL/SQL, and SQL to solve real-world business challenges.
I am a 3X Oracle APEX Professional Certified Developer and also an Oracle ACE Associate Member, actively contributing to the Oracle community by sharing knowledge, insights, and best practices. Through my blogs, I aim to help developers learn, grow, and build better Oracle APEX applications together.