1. Introduction
In many web applications, the footer is an essential element that helps with branding, navigation, and providing important information like contact details, copyright, terms & conditions, or quick links.
In Oracle APEX, there is no direct region type called “Footer”, so we need to design it using static regions + HTML + CSS, and make sure it stays at the bottom of every page.
2. Tools and Technologies
To achieve the desired functionality, the following technologies are used:
- Oracle APEX
- HTML
- CSS
3. Business Requirement
✔ Footer must be visible on all pages.
✔ It should always stay at the bottom, even when the page has less content.
✔ It should display Company Branding (logo/name).
✔ It should contain Quick Links (Home, About, Contact).
✔ It should have a Get in Touch / Contact Section.
✔ It should be Responsive (works on mobile and desktop).
✔ Easy to maintain and modify using Shared Components.
4. Implementation Steps
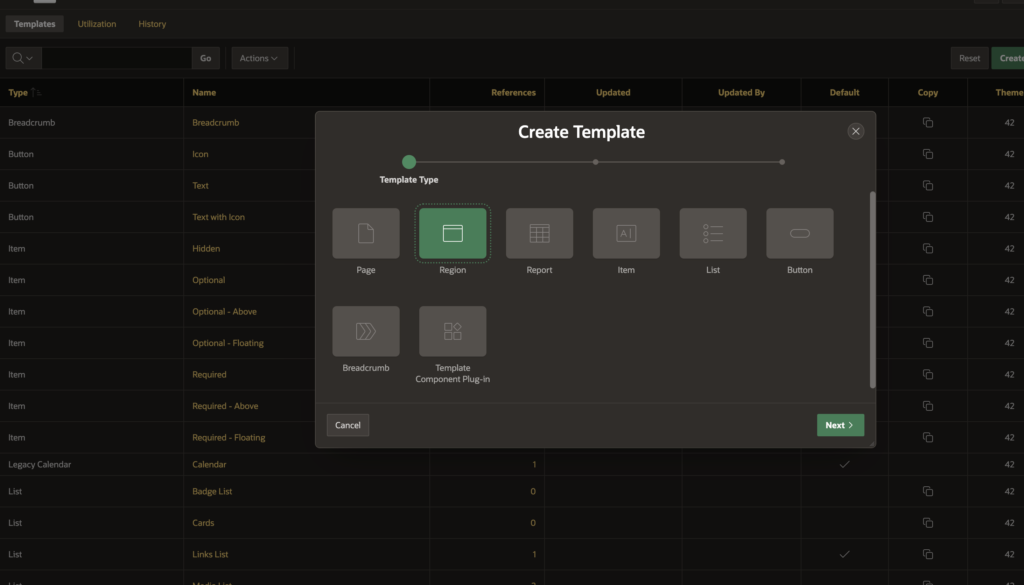
Step 1: Go to the Shared component then go to User interface then click on template.
Step 2: After that click on Create button. And select Template type as Region.
- Create Region Templat: => As a Copy of an Existing Template
- Copy From Application => Select your Existing Application
- Copy From Theme => Universal theme
- Copy to Theme => your current theme
- For Standard Region: Copy =>Yes
Step 3: Now go to you New region copy of Standard and provide below code in Template.
<div class="sub-footer">
<div class="sub-footer-col sub-footer-col-dept">
<h5>Oracle APEX Hub</h5>
<img class="tn-foo-logo" src="#APP_FILES#app-101-logo.png" width="200" height="50" alt="Logo">
<p>
We created this blog to share knowledge, insights, and <br> solutions around real-time issues, new features, <br>and step-by-step tutorials that help developers and businesses make the most out of Oracle APEX.
</p>
</div>
<!-- QUICK LINKS SECTION -->
<div class="sub-footer-col sub-footer-col-links">
<h5>Quick Links</h5>
<ul class="quick-links">
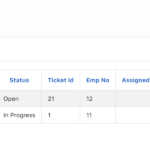
<li><a href="f?p=&APP_ID.:1:&SESSION." target="_blank">Home</a></li>
<li><a href="f?p=&APP_ID.:12:&SESSION." target="_blank">Tutorials</a></li>
<li><a href="f?p=&APP_ID.:5:&SESSION." target="_blank">Oracle APEX Blog</a></li>
<li><a href="f?p=&APP_ID.:15:&SESSION." target="_blank">Oracle APEX Quiz</a></li>
<li><a href="f?p=&APP_ID.:20010:&SESSION." target="_blank">Feedback</a></li>
<li><a href="f?p=&APP_ID.:10010:&SESSION." target="_blank">About Us</a></li>
<li><a href="f?p=&APP_ID.:16:&SESSION." target="_blank">Contact Us</a></li>
</ul>
</div>
<!-- GET IN TOUCH SECTION -->
<div class="sub-footer-col sub-footer-col-contact">
<h5>Get in Touch</h5>
<p><strong>Email:</strong> rai.ankur@hotmail.com</p>
<!-- <p><strong>Phone:</strong> +91 98765 43210</p> -->
<p><strong>Follow Us:</strong></p>
<div class="social-icons">
<a href="https://www.linkedin.com/in/ankur-rai-283341247/" target="_blank"><i class="fa fa-linkedin"></i></a>
<a href="https://www.whatsapp.com/channel/0029Vb7FsfDAzNbmtVampk2s" target="_blank"><img class="wh" src="#APP_FILES#Screenshot_2025-11-26_at_11.13.01_AM-removebg-preview.png" width="20" height="20" alt="Logo"></a>
<a href="https://www.facebook.com/" target="_blank"><i class="fa fa-facebook"></i></a>
</div>
</div>
</div>Step 4: After that create css file with below code and upload in Static Application File in Shared Component.
.sub-footer {
    display: flex;
    justify-content: space-between;
    gap: 20px;
    padding: 30px;
    /* background-color: #f4f4f4; change as per theme */
}

.sub-footer-col {
    flex: 1;
    min-width: 250px;
}

.sub-footer h5 {
    font-weight: bold;
    margin-bottom: 10px;
}

.sub-footer p {
    line-height: 1.6;
    font-size: 14px;
}

.tn-foo-logo {
    margin-bottom: 10px;
}

.gmap {
    width: 100%;
    border-radius: 8px;
}

@media (max-width: 768px) {
    .sub-footer {
        flex-direction: column;
        text-align: center;
    }
}
.quick-links {
    /* list-style: none; */
    padding: 0;
    margin: 0;
}

.quick-links li {
    margin-bottom: 5px;
}

.quick-links a {
    text-decoration: none;
    color: #fff;   /* Default color */
    font-size: 14px;
    transition: all 0.3s ease;
}

.quick-links a:hover {
    color: #f17a24;       /* Hover effect */
    padding-left: 5px;    /* Small slide animation */
}
/* SOCIAL ICONS */
.social-icons a {
    margin-right: 10px;
    font-size: 20px;
    text-decoration: none;
    border: 1px solid white;
    border-radius: 100px;
    padding-top: 10px;
    padding-left: 20px;
    padding-right: 20px;

}
.fa{
    color: #f17a24;
}
.social-icons a:hover {
    opacity: 0.7;
}
.wh {
    border-style: none;
    margin-bottom: 3px;
}


/* Responsive for Mobile */
@media (max-width: 768px) {
    .sub-footer {
        flex-direction: column;
        text-align: center;
    }
}
Step 5: Then in Copy of standard template scrolldown and find Cascading Style Sheet Section.
In File URLs provide your static file urls as below image and click Apply Changes button
File URLs=> #APP_FILES#footer.css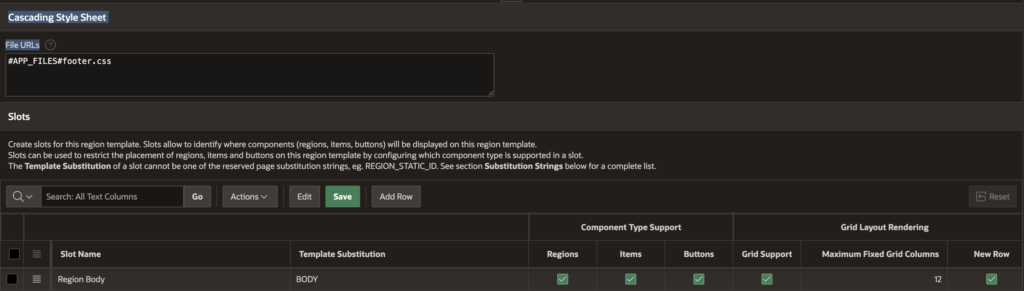
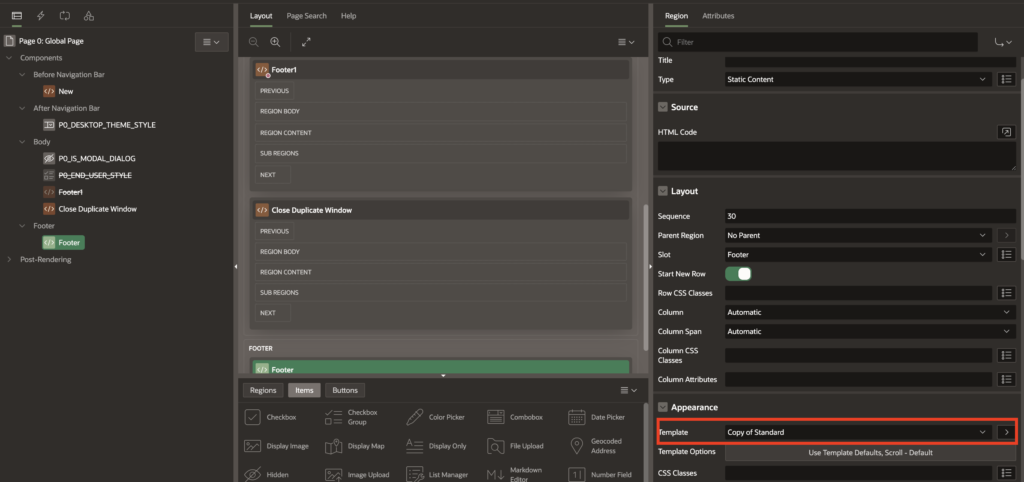
Step 6: Now go to your global page(0 Page)
In global page create new region in footer section and select template as copy of standard. Then Save Page and run the Application.
5. Output

Following the above steps, you can create footer in Oracle APEX. This ensures a smoother and more user-friendly experience.
Thanks for reading! We hope this guide helped you How to Create a Footer in Oracle APEX – Step by Step Guide.
Love coding? Me too! Let’s keep in touch – subscribe to my website for regular chats on Oracle APEX, PL/SQL,SQL JavaScript, and CSS.